
Premium Features
Going Premium
Agenda comes out of the box with a great set of features, completely free. There are no time or trial limits. You can use it forever, at no cost.
Agenda does offer extra premium features that require an In App Purchase, and that make the app even more powerful. If you decide to purchase the upgrade, you permanently unlock all current premium features across all of your devices. Each of them is described in detail below.
Additionally, any new premium features we add during your subscription period are also permanently unlocked, even if you later cancel. What is yours stays yours!
You can start a free 7-day trial after which a yearly subscription starts, or you can choose the lifetime premium option using a one-off purchase that includes all premium features, now and in the future.
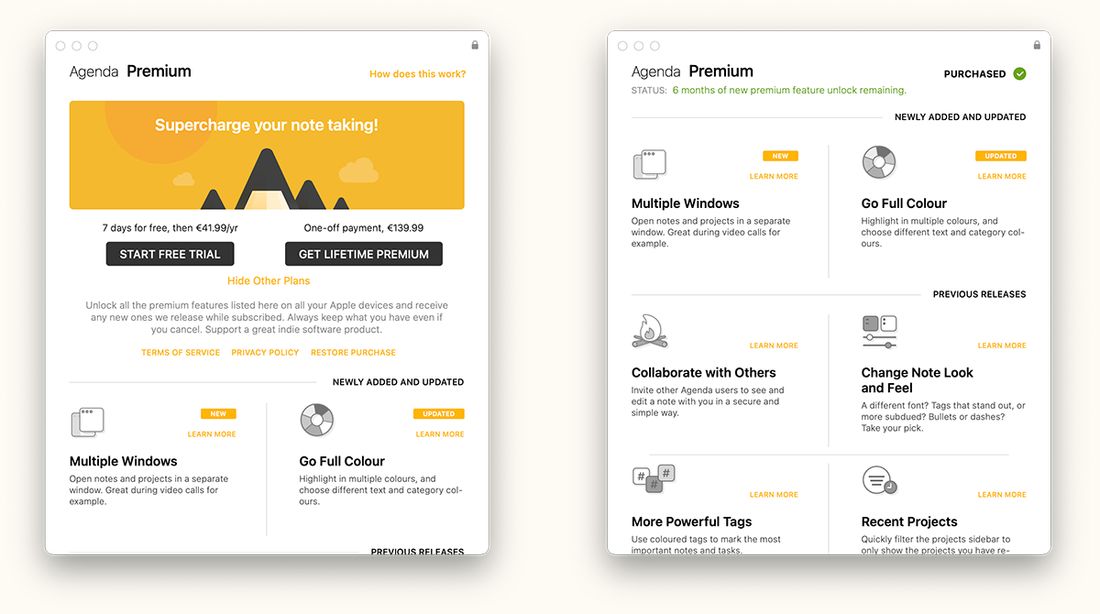
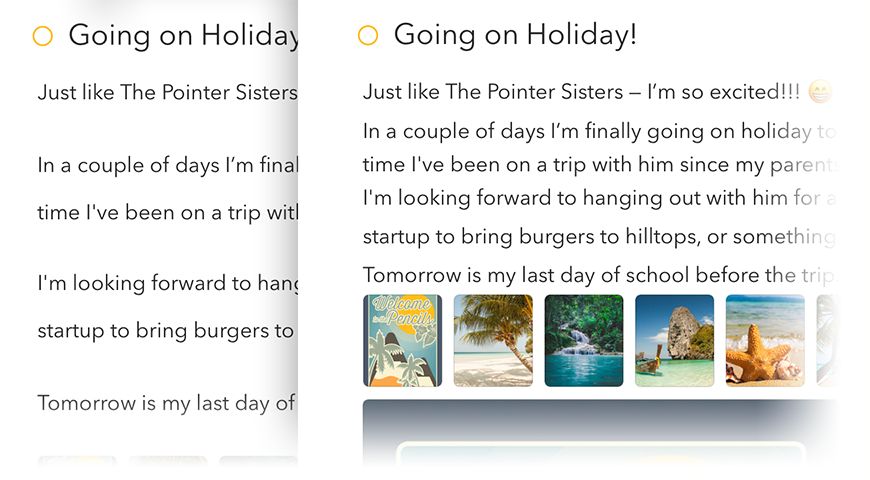
The Premium Features Overview before (left) and after (right) purchasing the premium features through an In-App Purchase. This window shows information about all the premium features and can be found under the Help menu on Mac or at the top of the sidebar on iOS.
The premium features will always include all your Apple devices. Once bought, simply log in to the same Agenda account in the Agenda preference on each of your devices to unlock the premium features.
Premium Features Overview
Apple Watch Favorites
Pick a handful of notes to pin to your wrist as Favorites and they’ll always be one tap away on your Apple Watch, in sync with your iPhone. Tap a row to open the note, tick off checklist items with a single tap, or dictate new paragraphs — including new checklist items, bullets, and numbered list rows.
The Watch app also shows a Relevant section, surfacing notes that matter right now based on their date and recent edits, just like the iPhone widget does. Changes made on the Watch sync back to your iPhone within a few seconds.
Learn more in the Apple Watch chapter.
Contacts Integration
Person tags in your notes can be linked to entries in your system address book. Once linked, the person popover gives you one-click ways to reach them — Send Email, Send Message, FaceTime, WhatsApp, and Open in Contacts — without leaving Agenda.
If the contact details change later — a new email or a new phone number — Agenda picks the updated info up automatically; it doesn’t store a snapshot. On macOS there are also two right-click actions, Convert to Person and Convert to Email Link, to upgrade older notes containing plain names or email addresses to fully-connected person tags.
The first time you use this, macOS or iOS will ask permission for Agenda to access Contacts. You can change this later in System Settings.
Send to Agenda
Send to Agenda gives you a personal email address. Anything you send to it — from your phone, your inbox at work, or someone else who emails you — arrives as a note in a synced Inbox project across all your devices.
Enable it once, from the Mac app under Agenda > Integrations > Enable Send to Agenda or from Settings > General on iPhone and iPad, and the Inbox appears in your sidebar everywhere. You can even route inbound emails to a specific project at send time by including a \move("Project Name") action anywhere in the body.
It’s the quickest way to capture something into Agenda without opening the app.
Drag and Drop Paragraphs
Reorder your notes more fluidly by dragging paragraphs and list items exactly where you want them. This makes working in Agenda feel much more like an outline or to-do list app, without the friction of selecting, cutting, and pasting text.
You can drag any paragraph or list item by clicking or tapping and holding just to the left of it, then moving it to a new position. Drop it where you want, and the surrounding text will adjust automatically.
On macOS, hover to the left of a paragraph or list item until the drag handle appears, then click and drag.
On iOS, tap and hold to the left of the item, then drag it into place.
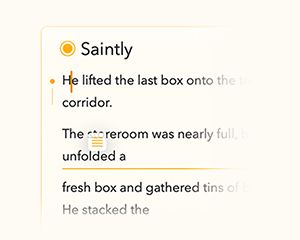
This works for both plain paragraphs and list items, making it easy to restructure notes as your thinking evolves.
Advanced Tables
Tables in Agenda are now much more flexible and powerful, while still staying lightweight and easy to use.
Table cells automatically adapt to the width of their content, so your tables stay readable without manual resizing. You can also reorder rows and columns by dragging them into position.
To drag a row or column, first select a cell, then tap or click the three-dots button. From there, you can drag the row or column to reorder it.
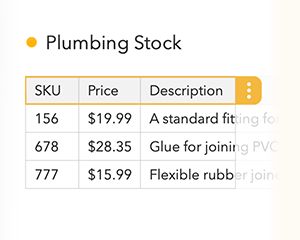
You can also mark rows as header rows to give them a distinctive visual style. To do this, select a cell in the row, tap or click the three-dots button to select the row, tap or click again to open the menu, and choose the header row option.
This makes tables better suited for structured data, lists, and lightweight planning.
Attachment Search
Searching in Agenda is now more powerful when working with attachments.
When you search, Agenda will now include notes that contain attachments—such as PDFs or text files—where the attachment itself matches your search term. Previously, search results were limited to the text written directly in notes.
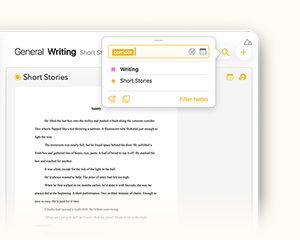
This means you can now find notes based on the content of attached documents, without needing to remember where you stored them or what you named the note.
Attachment search works automatically and is integrated directly into the existing search experience.
Ask Agenda Assistant
Ask Agenda is an on-device assistant that uses Apple Intelligence, and understands your notes to help you find answers quickly, without your data ever leaving your device.
You can ask questions about your notes in natural language, and Ask Agenda will return clear answers along with links to the relevant notes, so you can jump straight to the source.
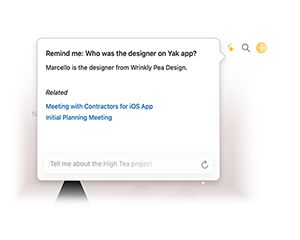
With this premium feature, you can also ask follow-up questions to refine or expand on previous answers. This makes it easy to explore your notes conversationally, build context, and dig deeper without starting over each time.
Ask Agenda works entirely on-device and never uploads your notes or personal data.
Folding and Filtering Text
Fold and filter text content to temporarily hide what is not relevant, and focus on the important stuff. Folding sections collapses the text under a heading or in a nested list, and filtering hides content that is not relevant at this point in time (eg checked off todo items).
In order to fold a section of text in a note, first locate the “parent” for the section, such as a heading or a list item containing nested items.
On macOS, hover over the parent to reveal a small round button on the left. Click that, and use the fold button in the top row on the right. (Note that if you hold in the option key, you can click the button to fold immediately.)
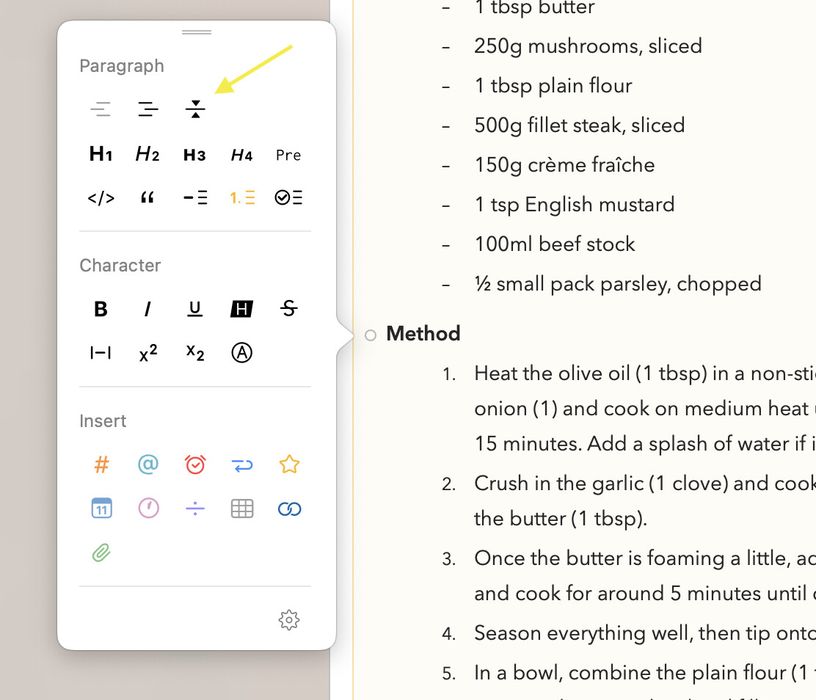
On iOS, put the cursor in the parent, and then use the fold button on the keyboard bar, which looks like a horizontal line with arrows above and below.
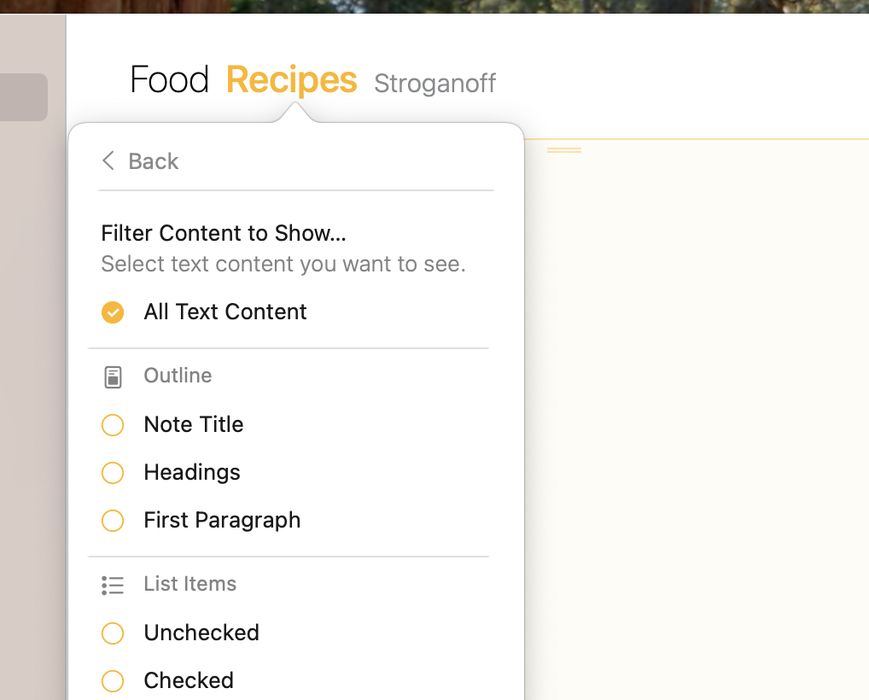
To filter text, tap or click on the project title at the top of a list of notes, and then tap the button on the right. Select any content that you want to appear for the current project or overview. Other content will be hidden while the filter applies.
Save Searches
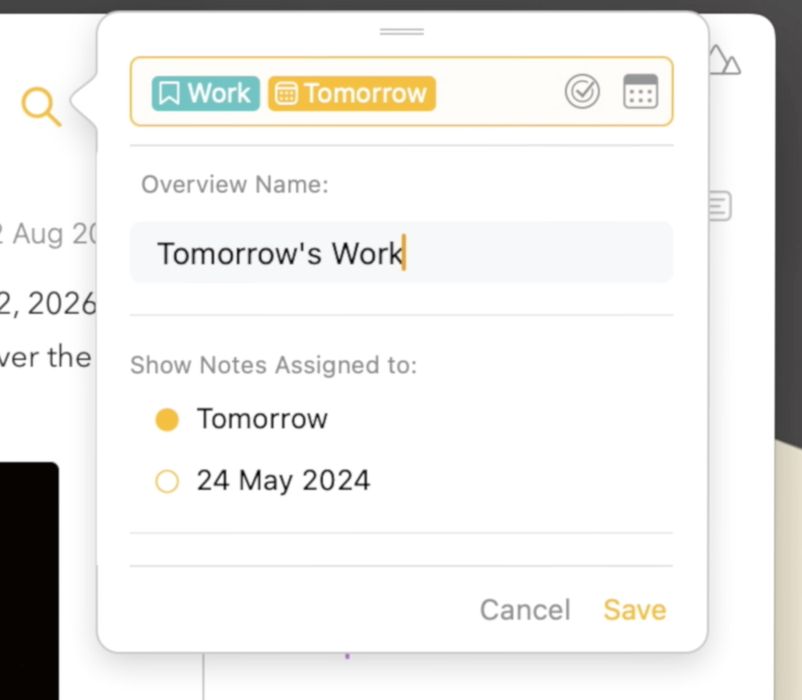
Save the searches you make regularly, and have them available in the sidebar.
In order to create a smart overview from a search, start by clicking/tapping the loupe icon, then do enter a search query that shows the notes you’re interested in. Next, click Create Overview and give the overview a name with which you want it to appear in the side bar.
Hide private notes and projects
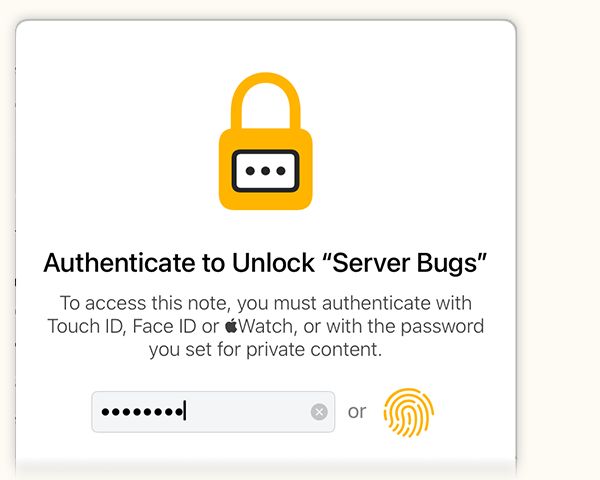
While some notes are meant to be shared, others might be strictly private and should not be seen by anyone else. Hide the content of notes and projects that are sensitive, and require authentication to see what is inside. You can even lock the entire app if you want! Authentication can be via a password that you set, or via Touch ID, Face ID, or your Watch.
Content that you unlock to view remains unlocked as long as you are working with it, and will lock again when you stop, like when you go to the screensaver, or to a different app for more than a few minutes. And, of course, you can lock things immediately if you choose.
Multiple Windows
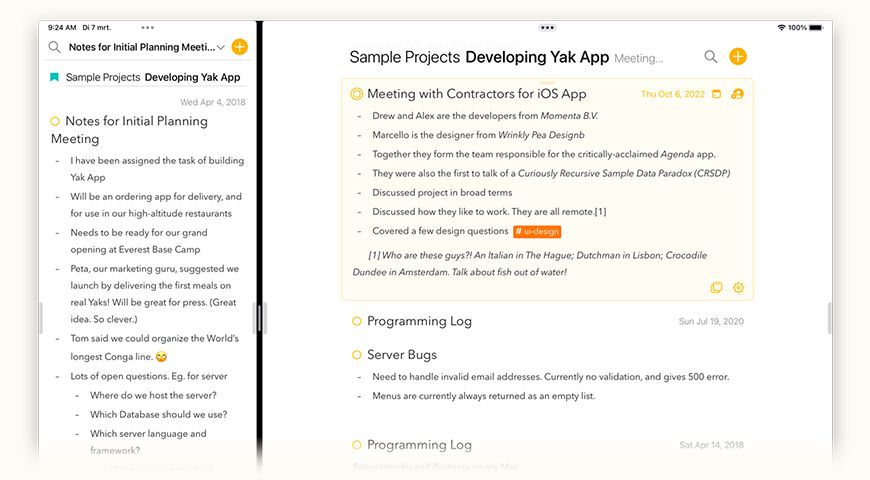
Agenda is a so-called shoebox app, a single window where all your notes live and that gives you everything important at a glance. Sometimes it can be super useful to open a note or project in a separate window however, for instance when you are on a video call or want to compare two notes.
Collaborate with Others
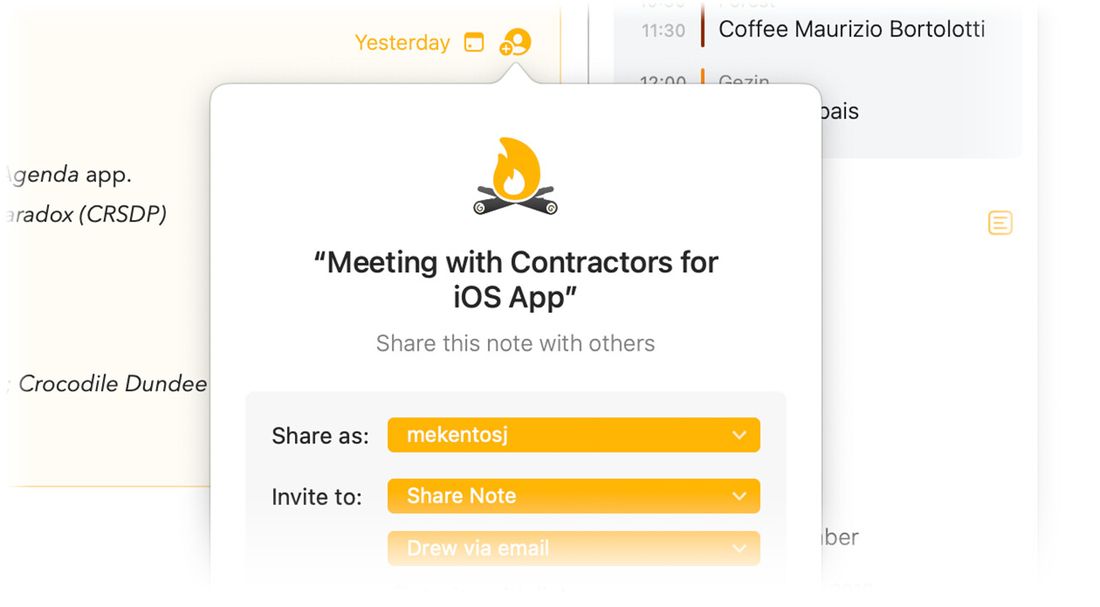
Agenda is perfect for your personal notes, but some notes are just meant to be shared. From team brainstorms to preparing for a family trip, you can now share notes with other Agenda users. To invite someone to your note you will need this premium feature, those you invite however do not need to purchase the premium features, they can partake using a free download of Agenda on any Mac, iPhone or iPad.
Custom Colors
Do you love the highlighting feature in Agenda but do you want to pick from more colors or your own custom color? That’s possible using this premium feature. It also allows you to pick a custom color for your project categories and background of your notes.

Powerful Tags
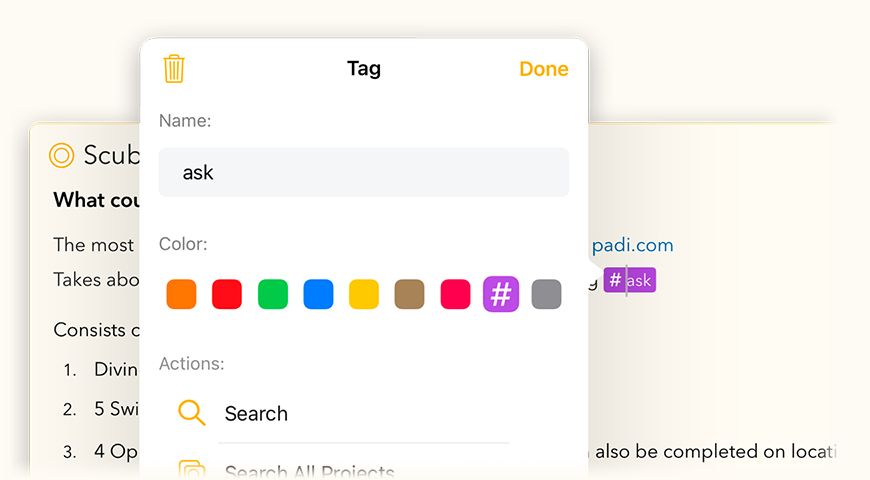
Tags are a great way to organise your notes, allowing you to highlight importance, classify tasks, etc. With this premium feature you can take this even one step further by allowing you to color code your tags. For example, label highly important items with a red #priority tag, and less important ones with a gray #later tag.
Recent Projects
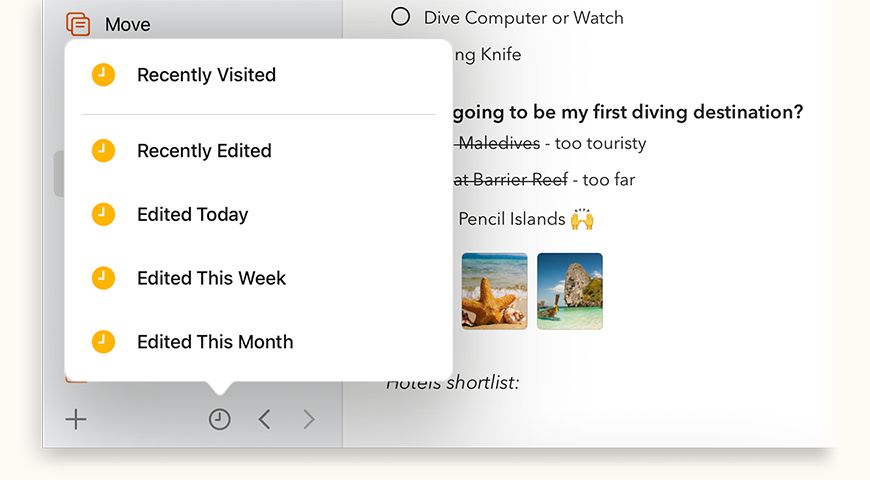
If you are like us and use Agenda for all your note taking, you can easily end up with many different projects. Of course archiving old projects is one way to declutter your sidebar, but even so, while most of the time we work on only a handful of active projects, you might still want to keep the others nearby as a quick reference. With the recent projects premium feature you can quickly toggle between showing all your projects or only those that you have been actively working on. You can even select whether you’d like to see recently visited projects, or say only those edited today or in the past week.
Annotate and Drawing Extras (iOS and iPadOS only)
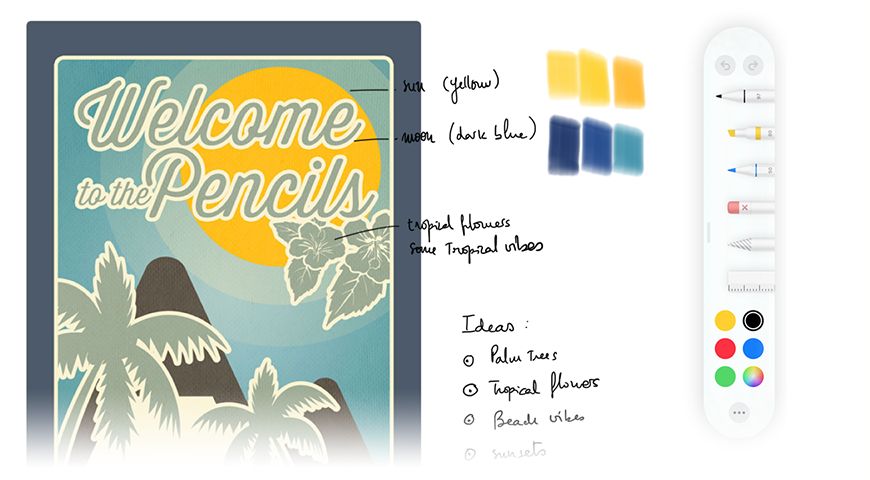
Add a drawing, handwritten notes, or highlights to the images in your notes.
Long-tap the image in your note and select Annotate in the popover menu. Afterwards you can further change or add annotations by choosing Edit from the same menu. Note that this does only work with images, not yet with PDFs, something we hope to make possible in a future update as well.
And starting in Agenda 14, you can also display lines and grids if you like to make hand drawn notes.
Change Note Look and Feel
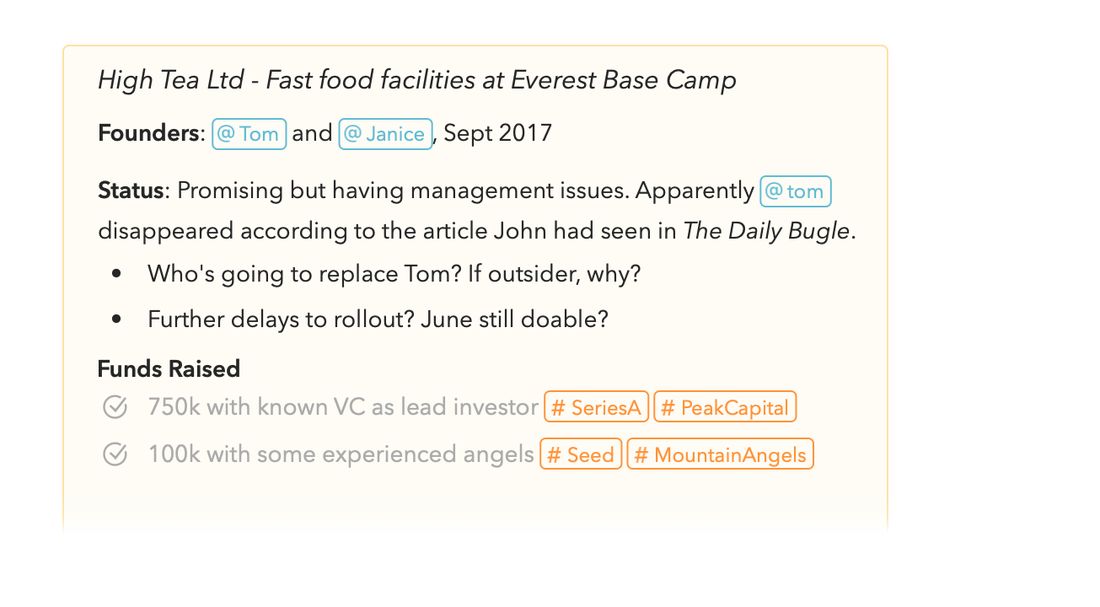
Change the look and feel of your notes in the new preferences screen. You can choose between the standard tag, people, and attachment tokens that stand out, or a more subdued variant. Likewise, you can choose to have lists be shown with bullets instead of the default dashes. Finally, you can change the way checked off list items look to either accentuate them by striking them through, or de-emphasize them by showing them greyed out.
And in Agenda 15 you can now also pick the font you’d like to use for your notes. Don’t like the default and prefer system font instead? Or a monospaced font like Courier or Menlo? Pick the one you like most.
Save Notes as Templates
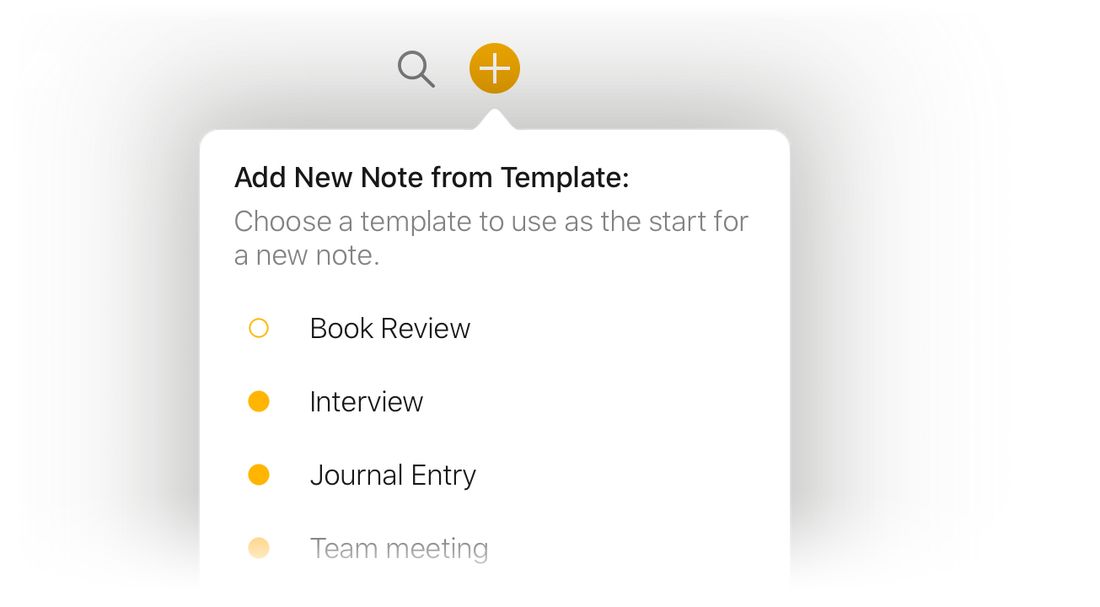
Save an existing note as a template and use it to create new notes from this template by click-and-hold (macOS) or a long press (iOS+iPadOS) on the plus button. Great for those notes that have a standard format, like meeting minutes and forms.
You can manage your templates by choosing Window > Template Manager from the main menu on macOS, or long-pressing the plus button on iOS+iPadOS and selecting Manage Templates. The template manager also allows you to create a template from scratch.
In Agenda 15 you can now also make the background color or pinning a feature of the template note.
Copy and Export as Markdown or HTML
Copy or export notes in markdown, TextBundle or HTML format, making it simple to paste into websites and other apps.
On Mac you find the options to copy under the Edit > Copy As menu, and export under File > Export. On iOS you find the same option when tapping the cog wheel in the lower right corner of a selected note.
Open Quickly
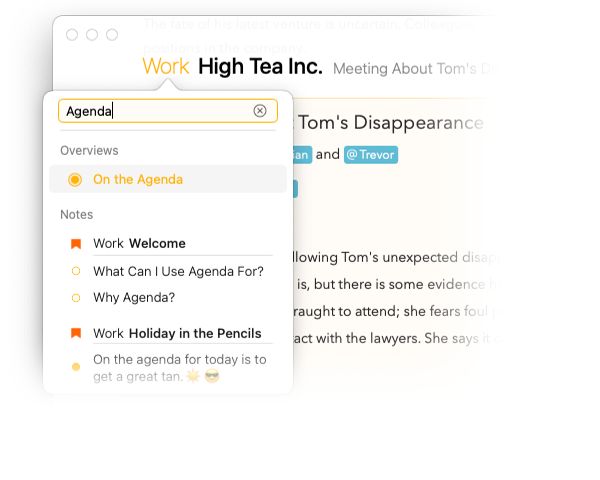
What if you could jump to any note in Agenda just by typing a few letters? That’s exactly what you get with the new Open Quickly feature. This premium feature brings up a floating search field when you hit ⌥–space. As you type, Agenda shows you matching notes and projects. Select one, and you are taken straight to where you want to be.
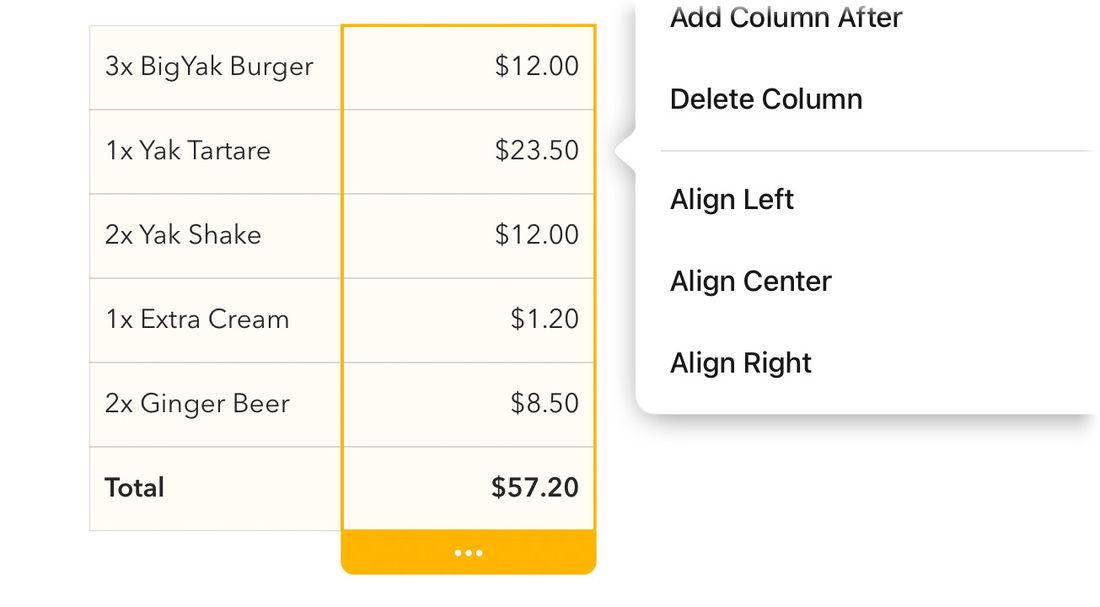
Change Table Column Alignment
Left, center, or right? Choose what works best for the text in each column of your tables and align it accordingly. Adding a column with numbers? You very likely want to right-align them to look better. Simply select the column and click or tap the three dots, you then have the option to change the column alignment.
Archive Projects
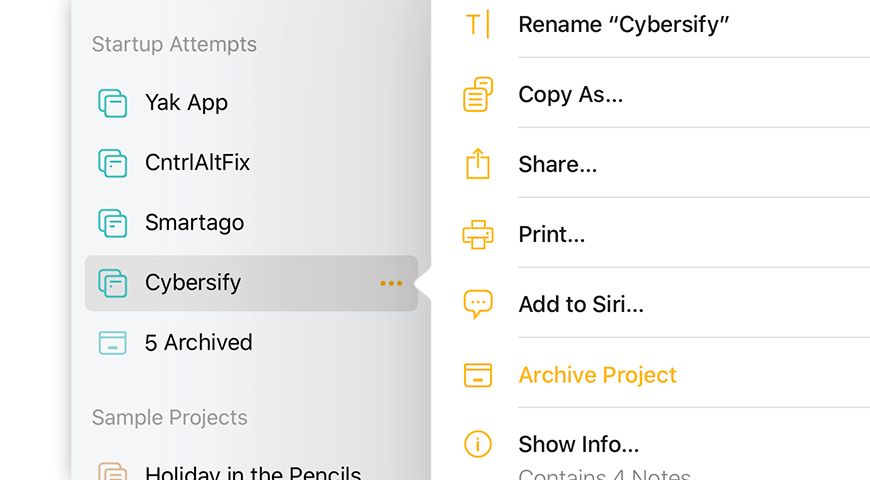
Keep the projects side bar clean and archive projects that are no longer relevant or have concluded.
On macOS, select one or more projects in the Sidebar and choose File > Archive Project, or select this option by right/control-clicking a project. On iOS and iPadOS tap the three orange dots next to a selected project and choose Archive Project from the popover menu that will show. You can also Long-tap and release a project to trigger the same menu.
Create Subcategories
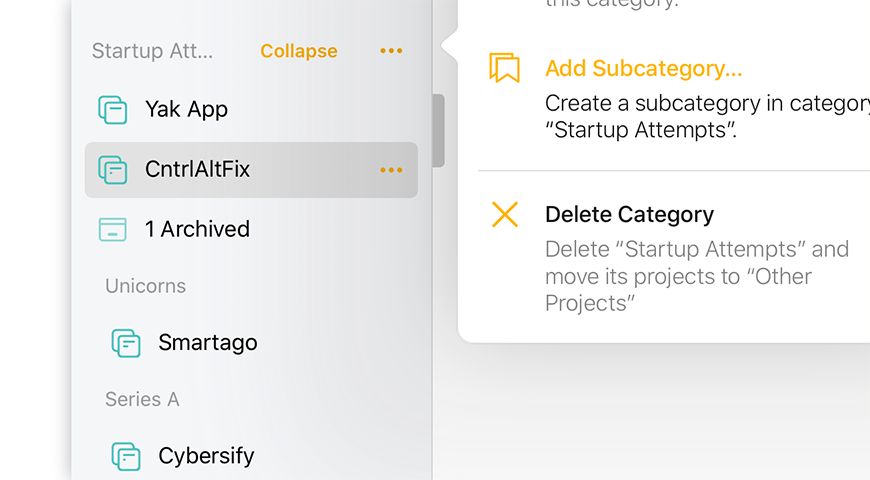
Easily stay on top of many projects by organizing them in subcategories.
The easiest way to create a subcategory is to simply drag an existing category on top of another category. You can also click or tap the three orange dots next to a category’s title to bring up a menu that allows you to create a new subcategory as well. Finally, on macOS you can both control/right-click a category to do this, or you can select multiple projects and choose File > New Subcategory From Selection.
Black Theme (iOS and iPadOS only)
A dark theme specifically designed for iOS devices with an OLED screen, saving battery life and blending in better with the blackness of the screen.
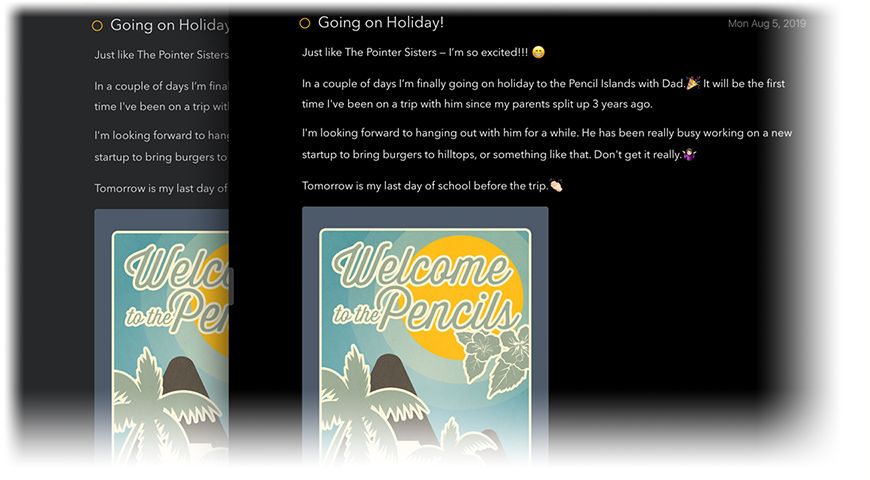
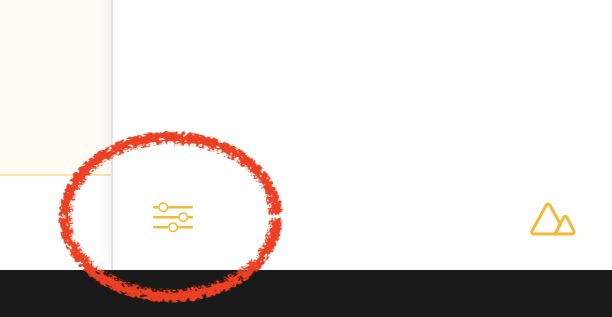
You find the setting in the Agenda preferences (accessible through the icon at the bottom of the right sidebar):
Quick Reminders
Create a quick reminder and add it to the Reminders app without the need to create a note.
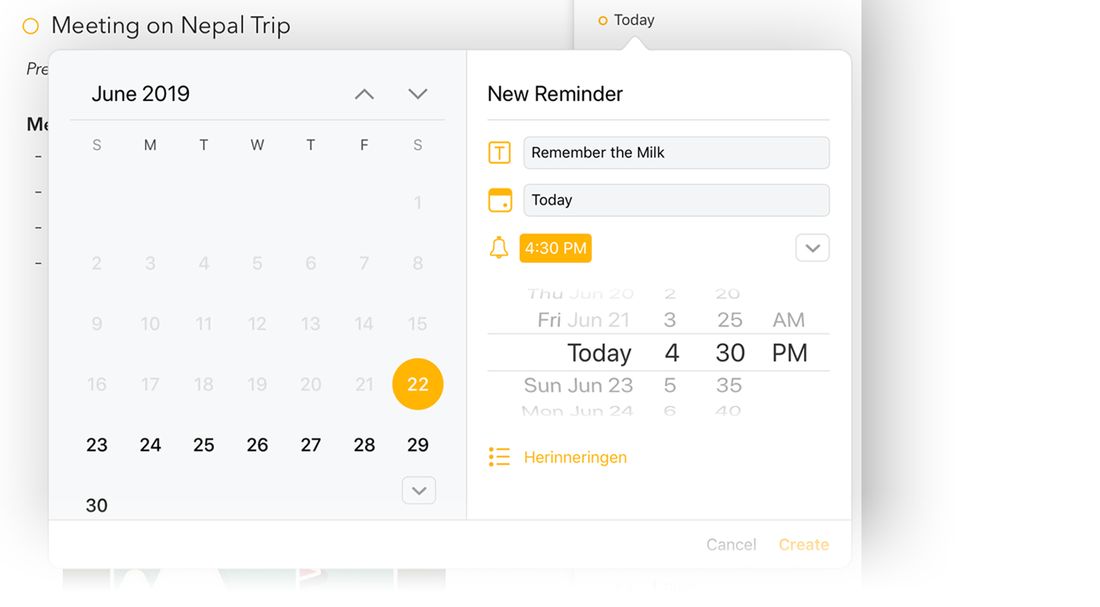
On Mac you can create a new quick reminder (and calendar event) by clicking the day header in the calendar in the related panel:
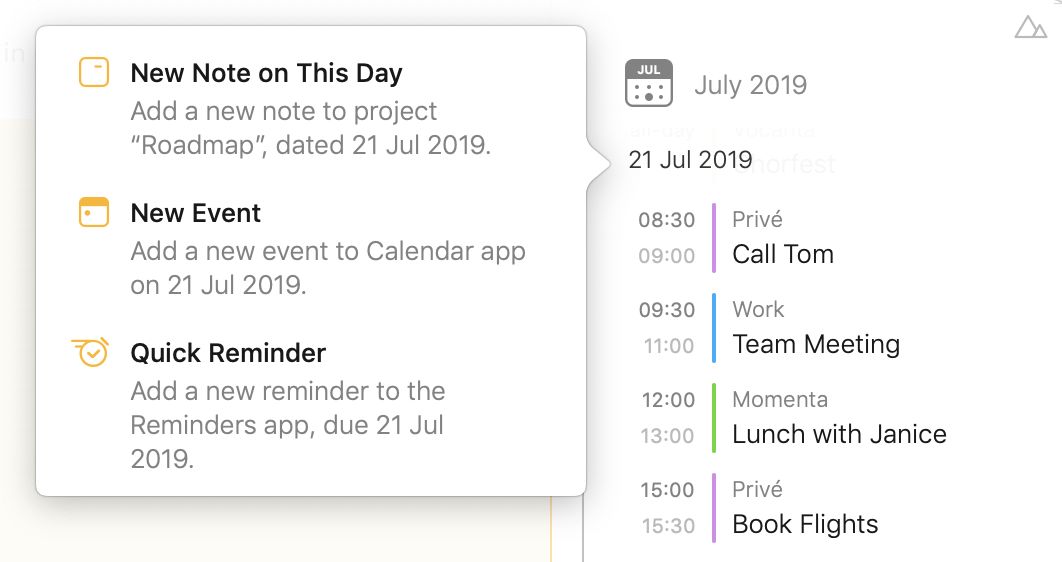
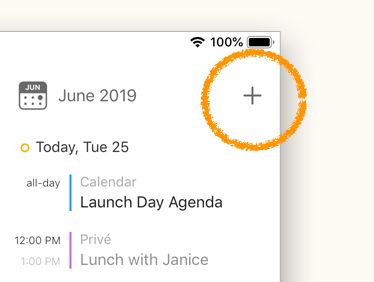
While on iOS and iPadOS you find the menu option to create a new quick reminder under the plus button in the top right corner of the related panel (which can be dragged to become visible from the right edge of the screen):
Custom Line Spacing
Do you prefer a compact or spacious layout? Set the line spacing of your notes to how you like it most.
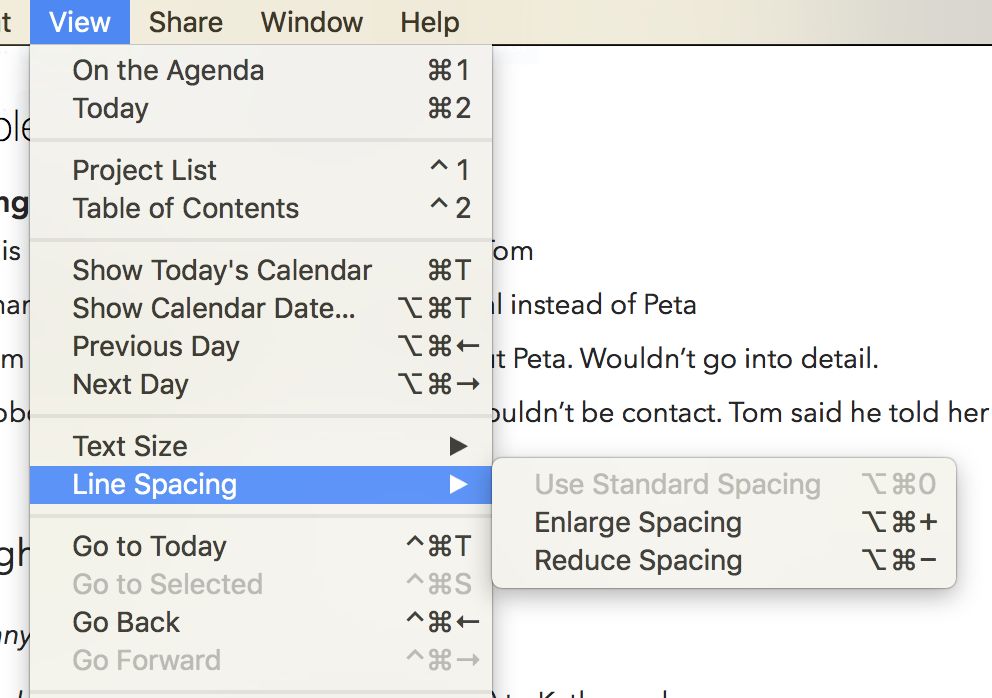
On Mac you can change the line spacing using the similarly named menu item under the View menu:
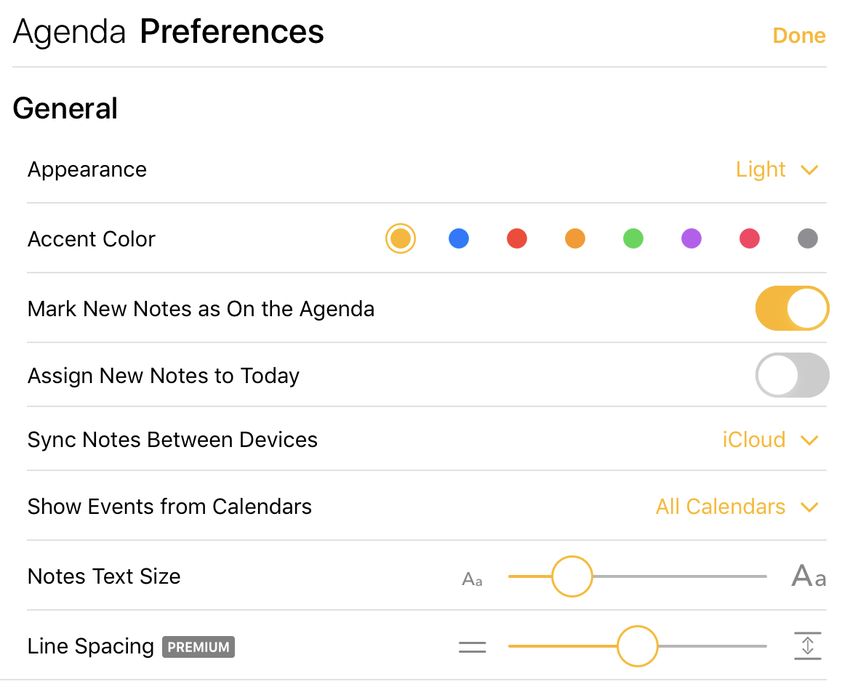
While on iOS and iPadOS you find the settings in the Agenda preferences (accessible through the icon at the bottom of the right sidebar):
Full Width Attachments
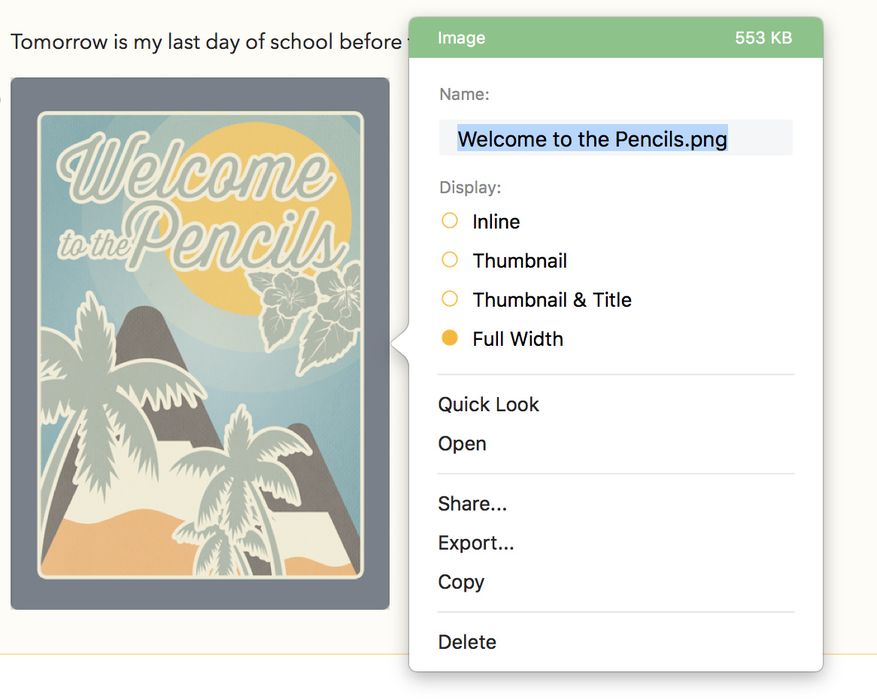
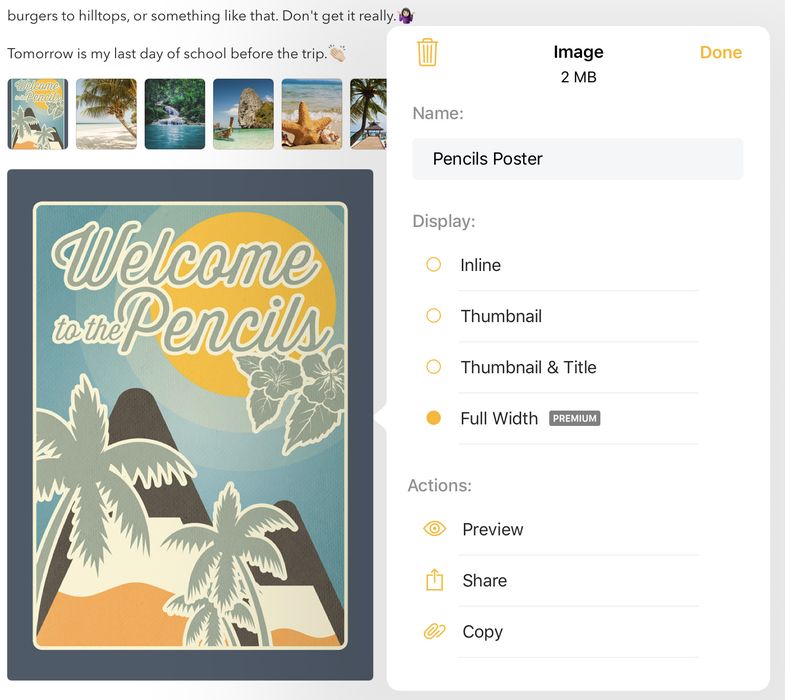
Choose between thumbnail and full width presentation of images.
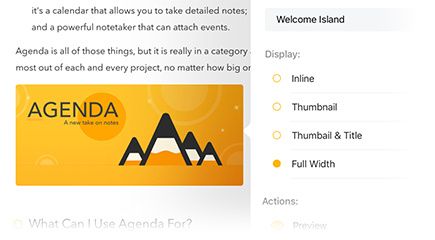
On Mac you can access the attachment display options by right- or control-clicking an attachment:
While on iOS and iPadOS you can get the same popover by tap-and-holding the attachment, then releasing it.
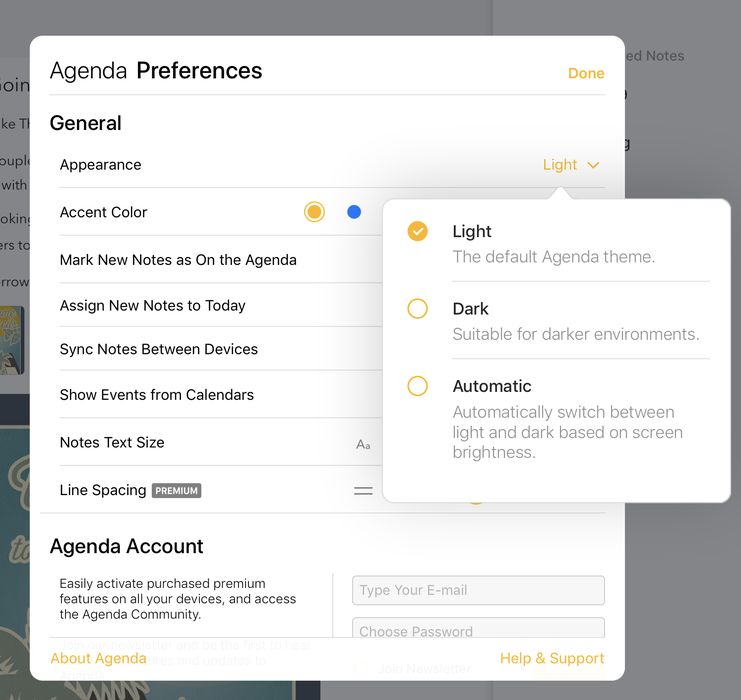
Auto Dark Mode (iOS 12 only)
Automatically switch between light and dark based on screen brightness.
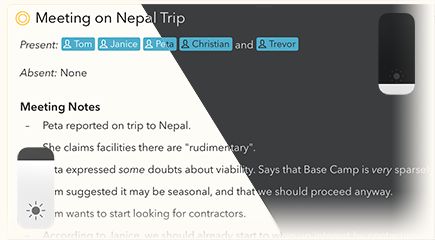
You find the setting in the Agenda preferences (accessible through the icon at the bottom of the right sidebar):
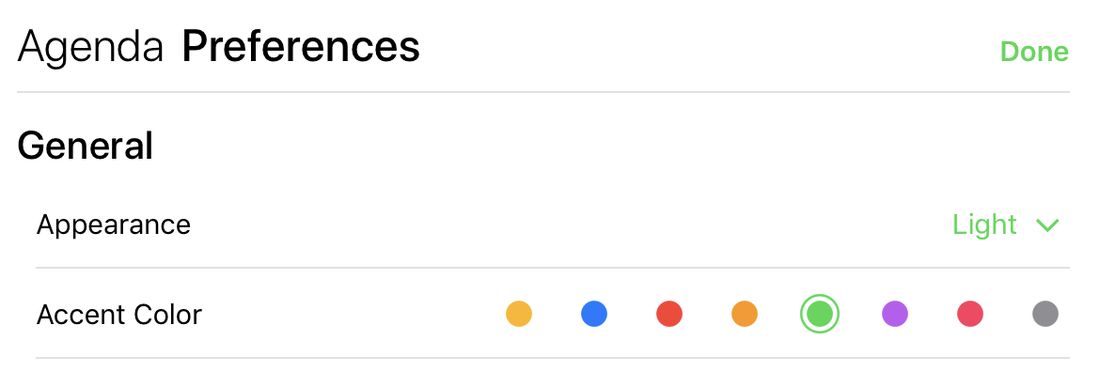
Custom Accent Color (iOS and iPadOS only)
Pick your favorite accent color for the Agenda UI.
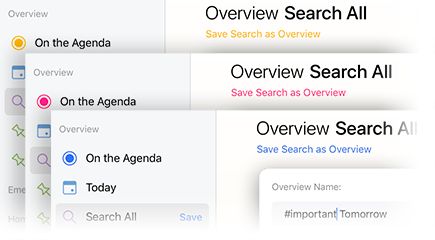
You find the setting in the Agenda preferences (accessible through the icon at the bottom of the right sidebar):
Choose Calendars and Reminder Lists
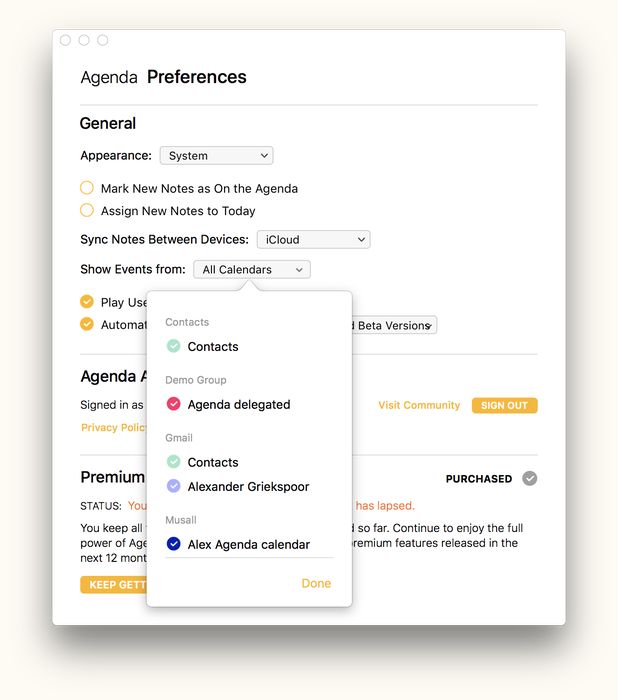
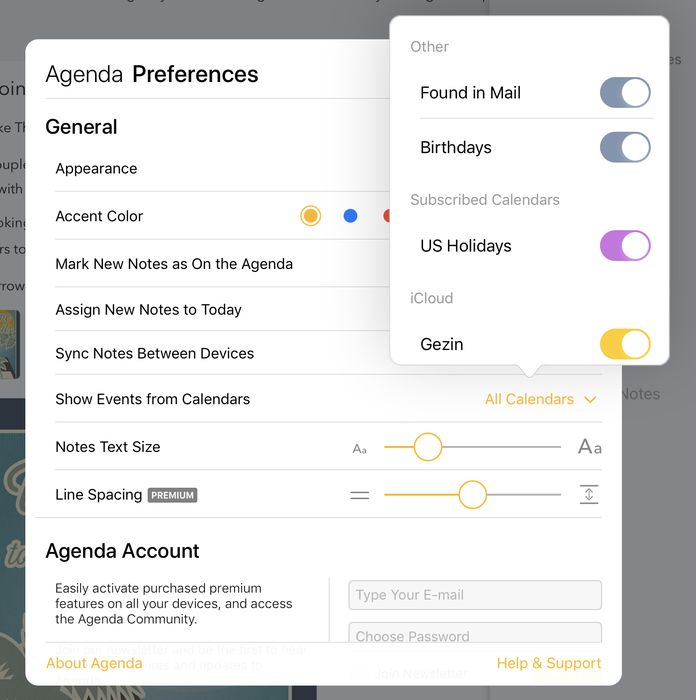
Select which of your calendars and reminder lists appear in Agenda, excluding the ones you don’t need.
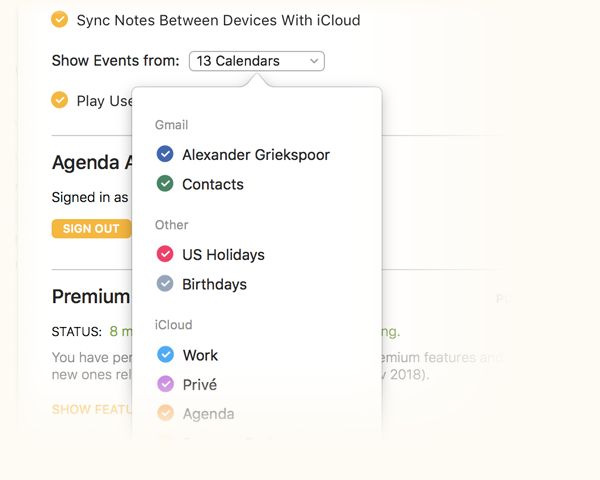
You find the setting in the Agenda preferences (accessible through the icon at the bottom of the right sidebar on iOS and iPadOS, and from the Agenda menu on Mac):
Pin Notes and Make Footnotes
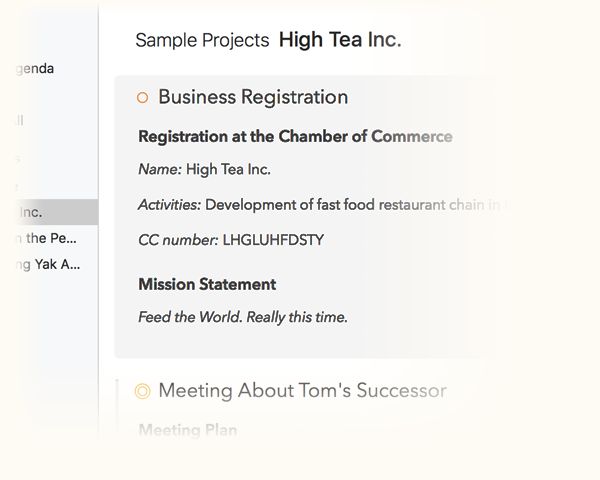
Keep important info at the top or bottom by pinning notes, or turning them into footnotes.
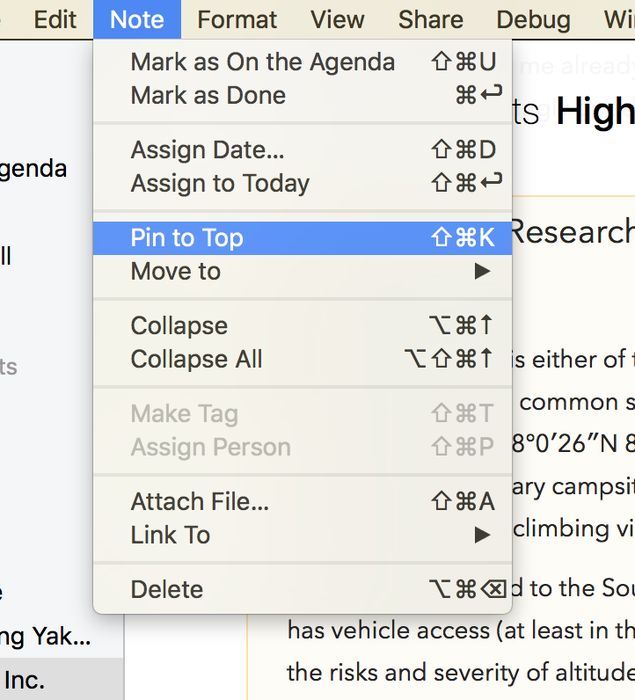
On macOS you can pin a note using the Note > Pin to Top menu option (or through the same option in the cog wheel menu):
On iOS and iPadOS you can pin a note by tapping the orange dot before the title of a note:
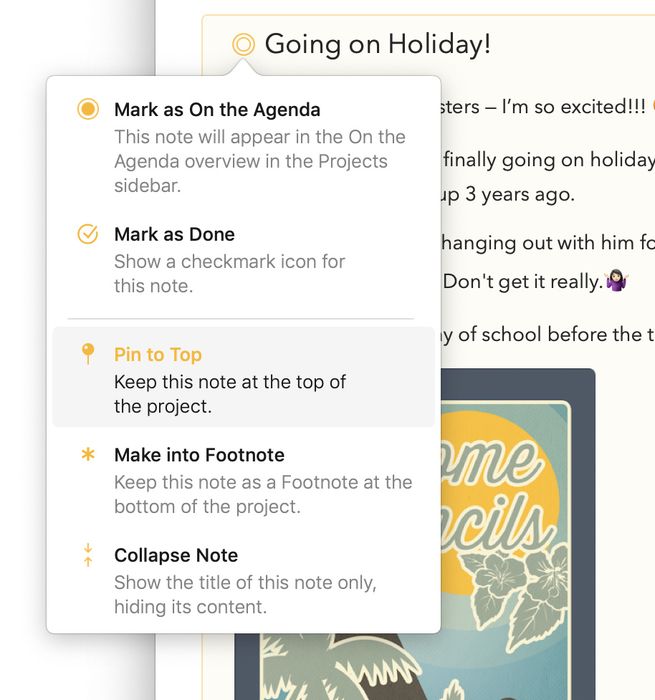
On both platforms you can also pin a note by dragging the note to the top of the project. Similarly you can turn a note into a footnote using the Make Footnote command in the same menus, or by dragging a note to the bottom of the project.
Create and Edit Calendar Events and Reminders
Create and edit calendar events and reminders from within Agenda. Events appear in the Calendar app, and reminders in the Reminders app, from where they are synced to all devices. Note that showing and linking to calendar events and reminders doesn’t require a premium feature.
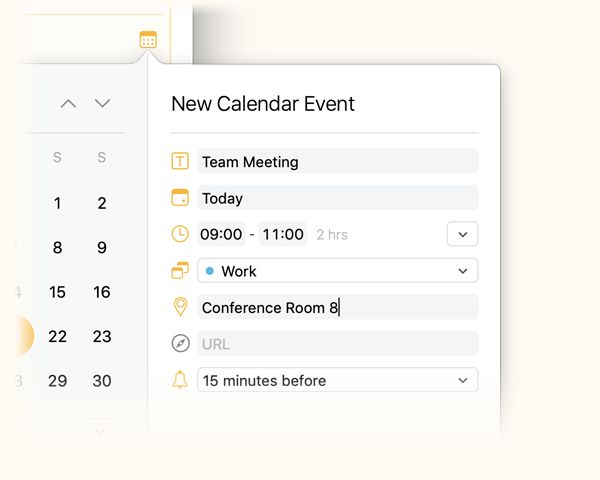
You can create an event (or edit an existing event) by clicking/tapping the plus button in the top right corner of the calendar date selection popover (shown when clicking the calendar icon next to the note title):
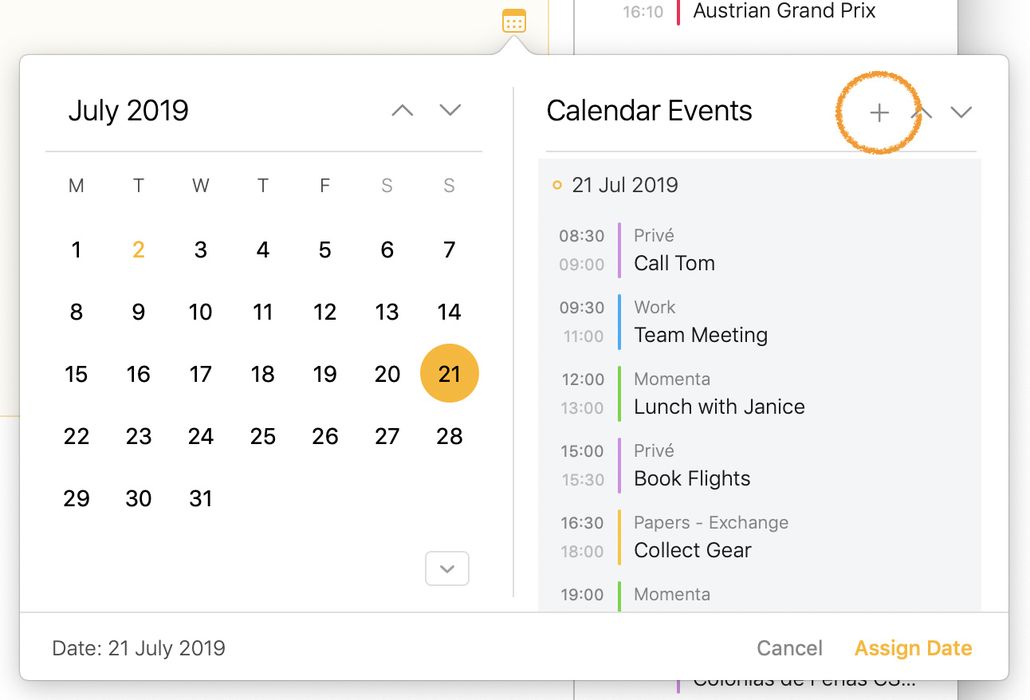
Alternatively you can click a day in the calendar in the related panel as well:
Or tap the plus button in the top right corner of the related panel on iOS:
Hide Watermark for Printing and PDFs - BONUS
Remove the Agenda watermark from print outs and exported PDFs.


